How to build
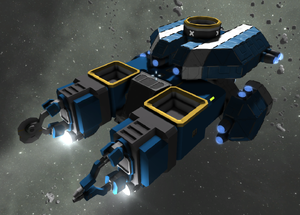
The main gameplay in Space Engineers is building functional structures such as space ships, drones, rovers, trucks, factories, mechas, space stations, planetary bases, and so on; these structures are called "Grids". Grids are made of blocks, blocks are made of components, components are made of materials, materials are made of ores.
This page is an overview of building concepts.
Tip: If you already know all the basics from this page, continue with the checklist of further game knowledge at Building Tips!
What are the Requirements Before Building?
In Survival Mode, you must have components (such as ![]() Steel Plates) in your inventory before you are able to place a block; the components are used up over time while welding.
Steel Plates) in your inventory before you are able to place a block; the components are used up over time while welding.
In Creative Mode, you can place all blocks "for free". If you want to practice building without worrying about components in your inventory, the best entry point is to do the Quickstart in Creative Mode.
How to Place Blocks
Building in Space Engineers means that you place blocks in the world:
- First select a Block (such as a
 Light Armor Block) from the Toolbar by pressing a number key from 1 key to 9 key on the keyboard.
 - Then
 -click in the world to place the block frame.
 - Making placed block frames functional is called welding.
- Dismantling and salvaging blocks is called grinding.
When your space engineer is holding a selected block from the Toolbar, you have entered Block Placement Mode. Holding a block is a prerequisite for certain keybindings to work, such as block rotation or texture painting.
Press G key to configure your toolbar by adding the blocks you want to build with. When the G-Menu is open, you can also hover the mouse over the Toolbar to read tooltips to identify a block or action. For details, read Toolbar.
What is a Grid?
A spaceship, a rover, a base, a mech -- any structure built out of blocks is called a grid. Make sure that the blocks snap together and touch each other when you build to form a grid.
Large grid? Small grid?
You build either large (think: space station sized) or small (think: car sized) structures.
In game terms, a structure is built out of either only large grid or only small grid blocks. Some blocks only exist in large-grid size, or only in small-grid size, most exist in both sizes. (For exceptions and more complex cases, read about multigrids and subgrids.)
Important: Press R key or press the same toolbar slot number again to toggle between large or small size before placing the block.
Static grid? Mobile grid?
A grid is either static or mobile.
Examples of static grids are:
- bases on planets
- bases on asteroids
- stationary cranes
- airfields and landing pads
- space stations (geostationary)
Examples of mobile grids are:
- spaceships (any grids with thrusters)
- race cars, trucks, and rovers (any grids with wheels and suspensions)
- Mechas (any grids using mechanical legs to walk)
- mobile utility machines, miners, fork lifts, constructors, salvagers, mobile cranes (with any combination of mobility blocks)
... and what ever creative thing you can think of!
What does welding mean?
When you place blocks in Creative Mode, they will appear fully built ("welded") in the world.
In Survival Mode, placed blocks appear as unwelded frames.
- Unwelded frames already have the mass and solidity of the finished blocks, and they already carry electricity.
- Unwelded landing gears are already magnetic.
- Unwelded frames have almost no hitpoints, which makes them quick and cheap to build, but very fragile when hit by one stray bullet or collisions.
- Unwelded functional blocks will not have any functionality, and they use no power.
- Unwelded conveyors and ports do not extend the conveyor system.
In Survival Mode, to benefit from the full functionality and hitpoints of a placed block, you must weld up the block.
- You either need to have components in your player inventory and use a
 hand-held welder on the block.
 - Or you must have components in a utility ship's conveyor system and use a
 ship-based welder on the block. The ship-based welder is faster and has a wider range than the engineer's hand-held welder.
While you weld up blocks, they progress through several build states. Which components are still missing? Point the hand-held welder at a block to get a HUD tooltip in the top right, listing required and missing components. Tip: Use the Build Planner to keep track of needed components for manual welding.
The block is functional once the required materials are welded up and the progressbar meets the Functional Line (red indicator bar in the tooltip). If the block contains ![]() Computers, a second blue indicator bar shows when the player receives ownership. Optionally, weld up the block up to 100% to increase durability against damage; mostly this means mounting additional
Computers, a second blue indicator bar shows when the player receives ownership. Optionally, weld up the block up to 100% to increase durability against damage; mostly this means mounting additional ![]() Steel Plates.
Steel Plates.
What does grinding mean?
Grinding a block removes it from the grid and returns the components into your inventory. If your inventory is full, components drop to the ground or float away in space, so beware.
Before grinding a block, verify that the block is not the only thing holding two halves of the grid together, so the grid does not break in two. (If that happens, fix it with Merge blocks.)
Tip: In creative Block Placement Mode, ![]() -clicking a block deletes it faster than grinding it would.
-clicking a block deletes it faster than grinding it would.
Basic Building Rules
How to start building a mobile or static grid
The placement of the first block determines whether it will be a mobile or static grid.
To start building a static grid:
- Select any large-grid block from the Toolbar, such as a Light Armor Block.
- The first block placed must intersect with voxels, such as asteroids or planet terrain.
To start building a mobile grid:
- Select either a large- or small-grid Landing Gear from the toolbar and place it as first block.
- No blocks of a mobile grid intersect with voxels.
Tip: You can grind off the initial Landing Gear later, it is just used to stabilise the mobile grid while building.
How to add power
If you want functional blocks to work (and not just use them as decorations), add Power blocks.
- All touching blocks of a grid carry electricity, no cables are needed.
- Note that Hydrogen engines and thrusters require a small amount of power to get the Hydrogen fuel from tanks through conveyor ports.
How to transport items through conveyor tubes
To facilitate the transport of items and gases between functional blocks, build a conveyor system on your base or ship.
Conveyors are useful if you need to move:
- Ores from drills into refineries,
- Materials from refineries into assemblers,
- Components from assemblers into Welder Blocks,
- Ammunition into turrets,
- Hydrogen and Oxygen gasses into tanks or into the Medical Room,
... or in general, any items into cargo containers.
Tip: Conveyors also give you the ability to drag and drop Items on the inventory screen!
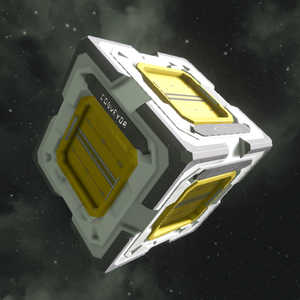
Blocks with conveyor access have visible yellow ports. Keep an eye on where the ports are when placing functional blocks: To link blocks into the conveyor system, either place them so that their ports touch, or connect the ports with ![]() Conveyor Tubes.
Conveyor Tubes.
How to make a grid mobile
Mobile grids are flying planes, space ships, and drones; wheeled race cars, rovers, and tanks; The following blocks are required to make grids properly mobile:
- To be able to turn (yaw left and right), or to level (pitch up or down) a mobile grid by moving the mouse, add gyroscopes.
- To control a mobile grid as the player, add a cockpit block (or a Remote Control or Automaton Block).
- To be able to accelerate and steer a mobile grid using the WASD keys, add one of the following mobility block types:
- Either thrusters in all six directions,
- or wheels and suspensions,
- or mechanical legs.
Is there an undo command?
There is no built-in undo command in a physics simulation where objects can be in motion at any time. Instead, you save often, and reload when there’s need to revert to the previously saved state.
- Quick-save the game by pressing SHIFT+F5 key.
- Quick-reload by pressing F5 key, which is basically a manual undo/revert.
If you are at a stage of building where you undo a lot, and you want full manual control about what is being saved, temporarily switch off Auto-Save in the World Settings.
See also: Klime‘s “Undo” mod on the Steam Workshop
Creative Mode Keybinds
In Creative Mode, with a block selected from the toolbar, you can CTRL key+![]() -drag to place several of the same bocks.
-drag to place several of the same bocks.
You can use CTRL key+C key to copy the targeted grid into the clipboard, including its inventory. Then optionally rotate the ghost preview into position, and paste it with CTRL key+V key. If you align the ghost preview with an existing grid, they automatically merge into a single grid when pasted.
You can use CTRL key+X key to cut the targeted grid. Cutting means, you keep a copy in the clipboard and delete the grid from the world. The next grid you copy or cut will replace the contents of the clipboard, so don’t forget to paste the copy if you don’t want to lose it.
See also Key Bindings.
Tutorial Videos
One way to learn the process of building is to watch the included videos: Press F1 key in game. You can even watch them offline.
Also watch the helpful videos shared online by the Space Engineers community, such as Splitsie’s tutorial videos.
Here are some examples:
What next? How to interact with blocks
You cannot interact with unfinished (unwelded) block frames.
You can interact with marked areas of welded-up functional blocks. For example, you commonly push buttons, open or close doors, enter cockpits, open inventory ports, configure blocks through built-in keypads, and more.
To interact:
- Weld up the block to a functional state.
- Aim and hover the crosshairs over the interactive area until a yellow highlight appears.
- Interact with the block by
 -clicking, or by pressing F key.
You already know all of this? Congrats! Continue reading with Building Tips.


