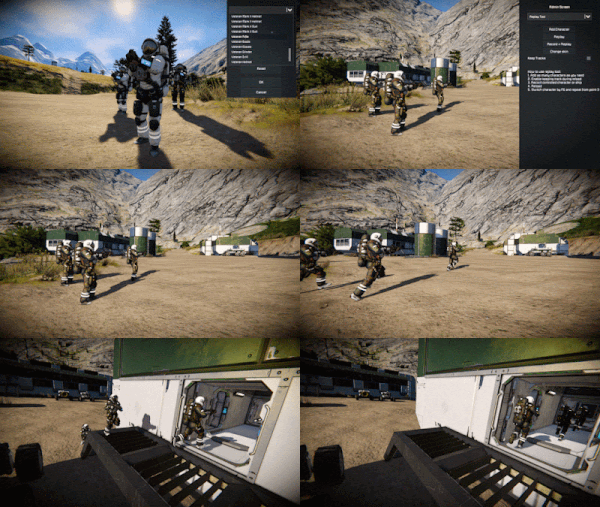
Replay Tool
The Replay Tool is an extension of Spectator Mode. you can use it to record yourself — even several times in the same scene, walking to different places, and the tool will replay a combined scene which appears to have multiple players (inter)acting in it.
The tool is typically used in Singleplayer Creative Mode. Press ALT-F10 key to open the Admin Screen and you’ll find the Replay Tool in the menu.
Note: The Replay Tool itself does not record any video. It only replays your inputs. You have to use an external video screengrabber to record the clips, and a video editor to stitch the clips together.
Usage
You can use this tool to create cinematic screenshots or video clips in singleplayer that have several actors in it.
Experienced users (machinima directors, streamers, multimedia artists, etc.) can combine the Replay Tool, Spectator Mode, and the Spectator Tool to control different "cameras" and "actors" to create complex animated scenes.
What can and cannot be replayed?
The Replay Tool replays your WASD keyboard and mouse inputs, and the save file stores your grids and actors in their start positions. You can replay walking (running, jetpacking, crouching), gestures and Emotes, using a handheld or grid tool/weapon, and you can steer ships and rovers that you are sitting in. You can set up Sensors, Timer Blocks, or Programmable Blocks to trigger any block action.
You cannot replay button pushes, remote control access, terminal interactions, nor clicking to open doors. Similarly, you can’t replay entering/leaving seats, nor entering/leaving cockpits[1]. Placing blocks is not replayed, either.
The replay of the physics simulation is non-deterministic, that means, bumping into something will look slightly different in every replay.
How to replay a "multi"player scene
1. Plan the story
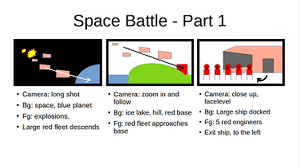
A storyboard is a visual movie script. Basically you outline how you imagine each scene as a primitive comic with boxes, circles, arrows, and stick figures -- nobody but you will ever see the storyboard, so waste no time making it pretty! Jotting down a storyboard will make it much easier to keep track of your scenes.
Tip: The fewer moving parts/actors per segment, the easier it is to record.
To lay out a storyboard:
- Visualise a series of short (meaning 10-20 secs long) segments.
- Add notes to each scene:
- How many engineers? Which suit colours? Which handheld tools?
- Which spaceships or vehicles?
- What will be in the background? Which buildings, asteroids, planets? (Include GPS coordinates of the chosen location)
- Which actor/grid shall stand/sit where, when, doing what, moving where to?
- Will you have to set up Timer Blocks/Sensors in the scene to substitute clicks?
- Seen from which camera angle? Note down where the camera shall be and which way it faces and whether it pans.
Example:
If one actor crashes a ship into a base and another actor runs towards the wreck, you must record the crash first for the wreck to be in position for the second actor. Depending on your story, the camera angle could be looking up from the ground, looking down out a window, or an aerial long shot from a surveillance satellite. -- Experiment and find out the best cinematic camera angle before you start recording.
2. Prepare Actors
IMPORTANT: Before you load your saved game, click Edit, go to Advanced World Settings, and disable Autosave.
- Load the save game.
- Press ALT+F10 key and select Replay Tool from the menu.
- Click Add Character, then click Change Character to select it.
- Press Change Skin to select the character’s look.
- Press ESCAPE key and move the actor in its start position (either standing or seated).
- Repeat this to add all actors and position them.
IMPORTANT: Press SHIFT+F5 key to save the game now.
3. Record each actor
- Press ALT-F10 key and open the Replay Tool from the menu.
- Click Change Character to select an actor.
- Click Record and Replay and make the actor perform their role.
- When one actors's scene is recorded, press Escape.
- After the Replay Tool opens again, click Reload World.
- Repeat step 2-5 for each actor and play their scene.
- When you’re finished, press Stop Recording, and press Escape to close the window.
- Save the game!
You can now return to the ALT+F10 key Replay Tool and press Replay to watch the scene.
4. Replay the scene and record the video
- Load the saved game.
- Use Spectator Mode (or even Spectator Tool) to position the camera.
- Press Tab or H to adjust the HUD and signal visibility.
- Start recoding a video file.
E.g. in Windows 10, press WINDOWS+ALT+R key to use the built-in GameBar. - Press ALT+F10 key to open the Replay Tool, and press Replay.
- Pan the camera and record the scene as planned in your storyboard.
You did write a storyboard, didn't you? :-P - Stop recording and save the video.
E.g. in Windows 10, press WINDOWS+ALT+R key again to stop recording.
Best practices
- Before recording the video, hide the HUD and performance warnings.
- Set the Field of View to 40; it'll make it look more cinematic and less like a game.
- Practice recording with short segments, one actor, one static camera, keep it simple.
Start with few actors and few camera angles until you have gotten the hang of it, to avoid frustration.
- For multi-actor scenes, set the most common suit colour on the game's main screen, so you don't have to set it for every engineer in the Replay.
- In each shot in your storyboard, plan for each actor to be either seated or standing. The Replay Tool does not handle standing up or sitting down.
- Press F6 to quickly cycle control from one actor to the next while recording, if needed.
Make one save file copy per segment:
- Open a copy of the previous save file, delete the previous replay in it, and reset the scene to an ideal starting point. Then record the next segment.
- This way, you are in full control of the start of the scene in each segment, no matter if, in the end of the previous replay, "the block dropped" in the exact desired spot or not.
Keep each segment short (10-20 secs) so you can concentrate on getting each shot right.
- Number and name the save files and video clips (e.g. "005-ship-crash-close-up"). This way you will be able to identify them quickly if you need to re-record a clip.
- Afterwards, piece the numbered recorded video clips and segments together in a video editor.
Caveats
You can’t record yourself building, because the tool doesn’t replay blocks being placed.
Don’t plan on recording long, complex scenes with many actors.
- For example, suit colour settings are sometimes lost when reloading and have to be reset for each engineer, which is tedious if you have many actors.
The Replay Tool is temperamental and buggy/incomplete. Replays of game physics simulations are non-deterministic, this means:
- Physics interactions (such as collisions, falling blocks, vehicle crashes, driving a ground vehicle, etc.) randomly end up slightly different every replay.
- You often have to record the same segment repeatedly and pick the most suitable variant.
- The longer the replay recording, the more non-deterministic it gets.
Minimise the extra effort caused by these inconveniences, by following the best practice of breaking up your project into small segments.
Related Videos and Blogs
- How to Use the Replay Tool in Space Engineers by Good Mushy Onion
- Replay Tool Tutorial by Xocliw
- How to Create a Video Storyboard by TechSmith
References
- Controls
- Spectator


