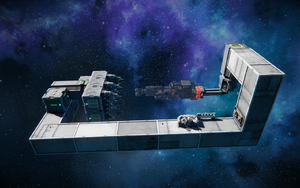
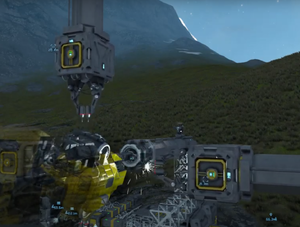
3D Printer
A 3D printer is not a block that exists in space engineers, but an advanced construction that you can choose to build.
Definition
You may know that you can use a ![]() Projector and weld up a blueprint, either with hand-held tools, or by controlling a welder drone. In any case, with this standard approach, production is slow and you have to do it all manually.
Projector and weld up a blueprint, either with hand-held tools, or by controlling a welder drone. In any case, with this standard approach, production is slow and you have to do it all manually.
In contrast, a 3D Printer is a purpose-built construction that quickly auto-welds projected grids. Setting up such a tool is useful for mass-producing small grids such as drones, mobile defense turrets, Player Built Weapons, or whatever you need.
The goal of a 3D Printer is that you merely supply suitable blueprints and components, and push the start button, and the printer welds up the blueprint quickly and efficiently without your supervision or manual interference. Don't expect to be mass-printing battle cruisers though; the larger and the more expensive and the more complex the 3D printer gets, the more it defeats its purpose of saving you time and effort. It works best for smaller grids.
Requirements
To build a 3D printer, you need:
 Block Welders
- A
 Projector
  Pistons and/or
  Rotors or
  Hinges to move either the welders or the projection to reach all spots
 Sensors,
  Timer Blocks,
  Event Controllers for automation
- Suitable blueprints (details see below)
Construction
There are as many different solutions for how to build a 3D Printer as there are grid shapes. Assuming you already have the necessary components stored and conveyored to the welders, your main challenge is to have block welders automatically reach all the blocks that must be welded.
If the welders cannot reach the whole projection, you need to either
- move the projection across the welders, or
- move the welders across the projection.
The trivial solution would be to build a "welder wall" as big as the projection itself, put the projector on pistons, and move the projection past the wall. But large welder walls are costly, inefficient, and cause lag.
It's better for server performance to use as few welders as possible. To achieve a 3D printer-like scan-line motion, where few welders move to cover a large area, you use pistons and rotors controlled by timer blocks and sensors.
Depending on the size and shape of the blueprint and available space, there are many different approaches. In all cases, you move either the projector on a piston, or the welders.
Examples
For inspiration, here some examples what a 3D printer can look like:
- Tarius' Kebab Printer
A Kebab printer is best for oblong ships. The projector spins on a rotor that is on pistons that move the projection past four welders. The four welders surround the projection orthogonally. The welders are also on pistons and face a central point on the projection’s path. The welders use sensors to detect subgrids and automatically extend and retract the pistons to not collide with finished blocks.
- From drop pod to full base in 35 seconds (Reddit)
A Record Player printer is best for flat and wide structures. Place a rotor in the middle, and place the welder facing down on the end of a horizontal piston. Spin the arm and slowly extend the welder outward in a spiral shape so it reaches every spot. - ISL - Small Ship Printer Basic MK 3
Spite's small ship printer pulls a small welder wall past the static projection. This is a simple rotor-less starter printer that everyone can build.
What are Suitable Blueprints?
What do we mean by blueprints being suitable for 3D printing? Not all blueprints are suitable for 3D printing, you will need to test them.
In the worst case, a 3D-printed ship will be missing blocks or will even fall apart. This happens if the welders could not reach all blocks, or could not reach them in the right order, or ran low on components half way through.
After the first test print, verify whether all blocks are there. If some are incomplete, try different projection rotations, angles, or slower welding speeds. If that doesn't fix it, you'll have to build the affected area differently and retake the blueprint.
Example: A gyroscope has only one mount point on one side. When the welder approaches from the opposite side, the gyroscope is not buildable yet because its mounting block is out of reach. If the welder passes too fast, it misses the window where the gyroscope's mount block is already welded and the gyroscope is in range to be built -- which results in the gyroscope never getting built.
Best Practices
Detachment
For drones, you may want to be able to automatically detach the finished grid using timer blocks. Using the old trick of attaching the initial projection with a stalk of armor blocks will however prevent a finished drone from lifting off.
For such cases, plan ahead how to attach and detach the new grid safely from the projector:
- One solution is to add an extra Merge Block to the blueprint, and to attach a second merge block somewhere on the grid where the projector is. Make sure to align both merge blocks so that the 3D Printer welds the merge block first.
- Another solution is to make the stalk weak enough that you can let it be grinded off to detach it. The grinder needs to be on a separate subgrid because grinders don't grind their own grid.
- Especially cool kids shoot the attachment block off with a static gun using a timer. ;-)
Component Supply
The welders must be supplied with a steady stream of components. If components run low mid-way and the welder cannot complete a block, and the piston moves on, some blocks remain unarmored or non-functional. Therefore it's recommended to conveyor the Block Welders to filled cargo containers. Keep an eye on the contents and assemble more parts to prevent running low on something. The Assembler offers production shortcuts for all blocks.
Preparing the blueprint
Blueprints also save the state of the grid and its toolbar. For example, if the thrusters were off when you created the blueprint, then the finished grid's thrusters will also be off. If thrusters were on in the blueprint, the finished thrusters will also be on.
Consider what is best in your situation: Will the burning thrusters of the newly built ship keep the ship stable but burn holes in the 3D printer? Or will the finished ship drop like a rock because you forgot to switch the thrusters on before detaching?
Auto-Retracting Welders
Piston based scan-line welding contraptions are elegant, but also run a risk of getting stuck on the projected grid. Add Sensors to the welder blocks to detect and react to obstacles such as subgrids: When a welder comes too close to the welded grid, retract the welder's piston; and when the welder detects it is free of obstacles, extend the piston again.


