In this tutorial, you will learn how to create a SEUT Material Library which serves as a holder for custom materials used in multiple BLEND-files.
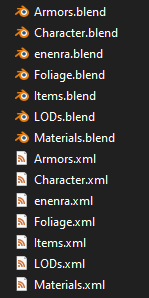
Setup & Creation
Step 1: Create an Object
First off, the way the SEUT Material Librarys are generally set up is with spheres that display each material contained within the Material Library. This makes it easier for users to find and select the material they want. But this can be any type of mesh really. Either way, create an object to assign the material to.
Step 2: Create Material
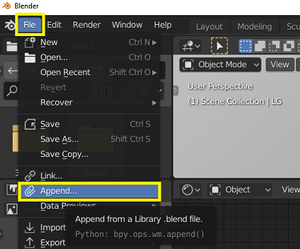
Create your material by referencing the Material Creation Tutorial or by using Blenders File --> Append-functionality to import the material into the file.
Step 3: Assign Material
Assign your material to the mesh used to display materials in your Material Library.
Step 4: Repeat
Repeat this process for as many materials as you would like this Material Library to contain.
Asset Setup
Step 1: Mark Assets
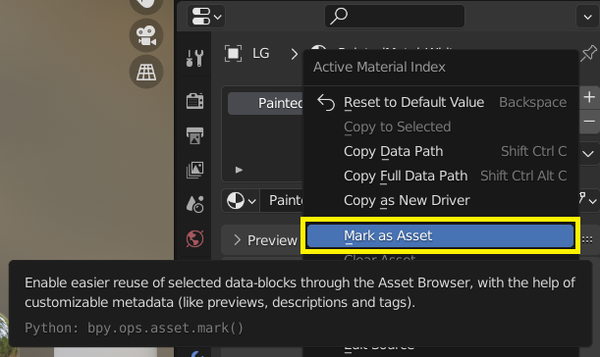
Right click your materials on the material list of the object each is assigned to and use Mark as Asset. This will add your material to the Asset Browser.
Step 2: Open Asset Browser
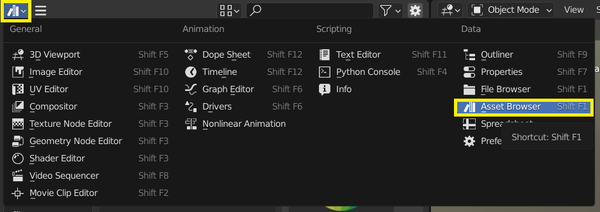
Open the Asset Browser by either opening a new window or switching an existing window over to it.
Step 3: Set asset parameters
Open the right hand toolbar with N while your mouse is in the Asset Browser window and set yourself as the Author of the asset you just created. If you want to, you can also add tags and / or a description to your asset. If your asset uses only textures available in Space Engineers and no custom textures, mark it with Vanilla. If your material uses textures that are otherwise only used on a DLC’s material, mark it with DLC.
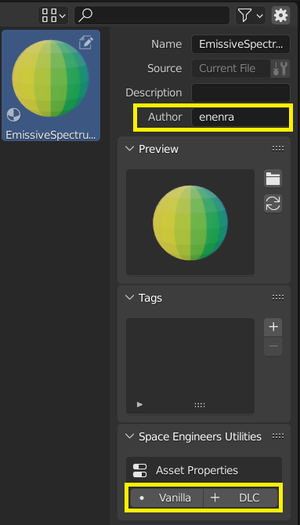
Step 4: Sort your assets
By default, your assets will not be assigned to an Asset Catalog.Create a new Asset Catalog under Custom and name it after yourself. (Below this you can create as many further catalogs as you want to further sort your assets.) Then drag & drop your assets into the respective catalogs.
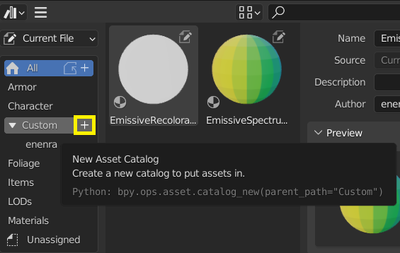
Export & Save
Step 1: Save BLEND-file
Next, save your BLEND-file to your [SEUT Assets]\Materials\-folder (SEUT Assets being the folder you defined in the Addon Preferences).
Step 2: Export materials
Go to the 3D Viewport and hit Export Materials in the SEUT Export Panel. This will export your material definitions to XML and place them next to your Material Library BLEND-file. The XML definitions are required by the MwmBuilder when converting your models to MWM.
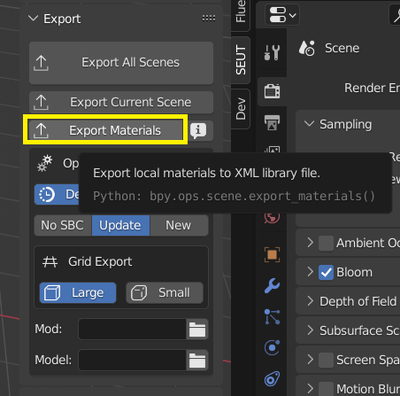
Step 3: Link materials
In your working BLEND-files (the files which contain individual models for mods) you will now find your custom materials inside of the Asset Browser. Make sure to always set it to Link to create an instance of the material contained in your Material Librarys, and not a copy.

Don’t forget to place the DDS texture files for all the materials you use on a model in that model’s mod!


