Installation Guide
How to set up your PC to run SEUT.
How to convert the textures for display in Blender.
How to install SEUT into Blender.
How to install Blender.
How to use Blender.
This tutorial will guide you through the installation of the Blender 4.0+ addon SEUT, its supplementary files and the additional required tools.
Download the Addon and Additional Required Tools
Install the Downloaded Files & Convert the Textures
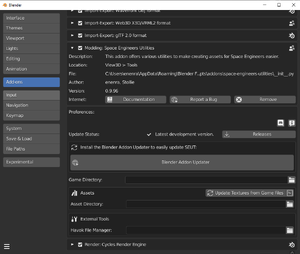
Edit --> Preferences... --> Add-ons and toggle Enabled Add-ons only to ON.Set up the Addon in Blender
Game Directory, set the path to your Space Engineers game installation - in most cases this will be C:\Program Files (x86)\Steam\steamapps\common\SpaceEngineers\ but your installation location might differ.Asset Directory is where your converted textures as well as various tools will be placed. Ensure that you have at least 15GB of free space on the chosen location’s drive. Choose a fitting folder and make sure it is not located within neither the Mod SDK folder nor the game installation folder.Asset Directory has been set, the Update Textures from Game Files-button will be enabled. This will convert all relevant textures (sourced from the Game Directory) and place them inside your Asset Directory. Note that this can take quite a while (more than 30min in some cases, but it’s strongly dependent on your PC) and Blender will be unresponsive during the process. This is why, there is a second button to the right of the Update Textures from Game Files-button, which enables the Blender System Console. It will show the progress of the conversion and also generally show more output and any errors that may occur. First open the Console, then press the update-button.When an Asset Directory is set, two more items will furthermore appear in your UI: Asset Status and MWMBuilder Status. Both are downloaded, installed and kept up to date through this Preferences menu. Hit Download & Install for both of them. Their status should update shortly to “up to date”. Finally, set the path for the Havok File Manager to the hctStandAloneFilterManager.exe located in your Havok installation directory.
Rate Limit Exceeded!, this means that the GitHub API, which is used to provide version information and direct download links, has been paused due to too many requests for its data. It will “unlock” again soon, likely within 30m to 1 hour, at which point you can refresh and proceed with the installation normally.What now?
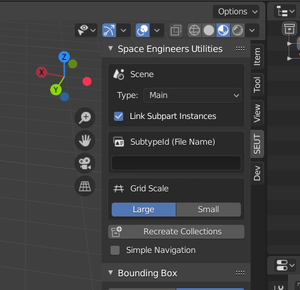
This concludes the installation and setup of the SEUT addon for Blender. Now is a good time to familiarize yourself with its interface and usage. To help you with that, a thorough reference for the addon’s functionality as well as extensive tutorials about to use said functionalities have been created. You can find them below.
Additionally, you can join the SEUT Discord and KeenSWH Discord. While the former is the official place to get help with the addon, the latter generally has more active SEUT users checking it.
Lastly, please note that SEMREF nor the people on either discord are there to teach you the basic controls and functionality of Blender itself. There are hundreds of available tutorials online, in whatever form you prefer. A good starting point, for example, is the page for Blender Tutorials. Please make use of that as it makes it much easier for us to teach you SEUT itself.
- Community
- Modding
- Modding Tutorial
- Space Engineers Utilities


