How to build a 3D holographic map
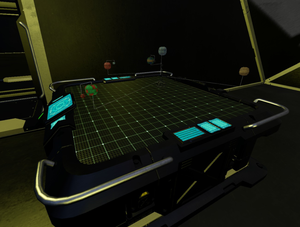
It would be cool to see your star system projected on a holo table on the bridge. Fact is you can project anything you can build out of blocks in creative mode. So one way would be to build a static model of your star system in creative mode and project that blueprint in survival. This is the example we will use here, but feel free to improvise.
Obtain map data
Before you can create a star map blueprint, you need to have an idea where in space each planet is. You can "guesstimate" by looking around you in space or plot the precise coordinates in GeoGebra. For details, see How to Draw a Star System Map.
Aside: Orrery
A 3D map of our solar system is called orrery. Orreries used to be built out of wood and metal and had cranks, rotors, and gears to spin the planets into their current orbital positions.

Prepare the blueprint
We will build the model in small grid in creative mode. We know that the holographic table can scale down blueprints to fit.
Check your 3D star map in GeoGebra for reference. If possible, rotate the 3D plot so that you look down onto the star system plane.
In Space Engineers, planets are immobile, they don't orbit around the sun. (Also in game, the Earthlike planet is at the center, not the sun.) So we have no need for a true spinning orrery. On the other hand, the design of an orrery is a good inspiration for the model to build.
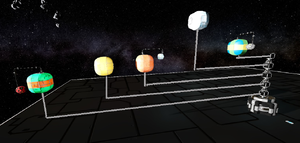
The center of the orrery is a stack of locked rotors with long horizontal stalks coming off each rotor. At the beginning of each stalk is the next stacked rotor. The stalks can be, for instance, Neon Tubes.
- The length of each horizontal stalk depends on the planet's distance to the center.
- The upper horizontal stalks are short, representing the inner planets.
- The bottom horizontal stalks are long, representing the outer planets.
Each horizontal stalk has a vertical stalk at its end pointing up.
- Choose the length of the vertical stalks so that their ends end up roughly on the same plane, a bit above the topmost rotor, but also a bit irregular.
- At the end of each vertical stalk is a spherical planet.
Build planets e.g. out of ![]() Round Armor Slope and
Round Armor Slope and ![]() Round Armor Corner. Paint the planets in the model according to the color of the planet they represent.
Round Armor Corner. Paint the planets in the model according to the color of the planet they represent.
The bottommost rotor holds the outermost planet, and the topmost rotor holds the innermost planet, and everything in between is sorted by distance.
Optionally, add short sideways stalks to planets that have moons. You can build moons out of warhead blocks.
Look down onto the plot in GeoGebra and look down at the model in SE:
- Keep the first rotor (the bottom one with the longest stalk) locked and align your GeoGebra map so this alignment corresponds to the outermost planet.
- Unlock the second rotor and rotate the rotor so it aligns with the planet second-furthest from the center and lock the rotor again.
- The rotor will drag all the other stalks above with it.
- Unlock the third rotor and rotate the rotor so it aligns with the planet third-furthest from the center and lock the rotor again.
- Again, the rotor will drag all the other stalks above with it.
- and so on
Create a blueprint of this orrery and project it on the bridge console table.
Related video
A larger advanced version of the same concept by BlackArmor:


